Why change what seems to be a perfectly good chain?
The answer’s actually simple: chains wear out and even break. That wouldn’t be a problem except that “wearing out” means a chain gets longer. Here’s why:
 |
| The anatomy of a chain. |
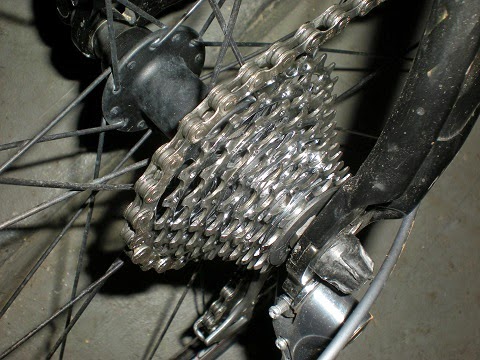
When a chain's new, the spaces between the rollers exactly match the spaces on your chainwheels and cogs (what most call front and rear “gears,” respectively). As the chain wears, the pins connecting the links (hidden inside the rollers) wear down and allow the chain to get slightly longer. This, in turn, grinds away at the teeth on the cogs, which changes the length of their spaces. If you have to install a new chain because the old one broke or a link froze up, the spaces will no longer match. That makes the new chain skip on the cog, and can wear out the chain faster than it should. Worst-case scenario, you may need a new cogset, which costs about three times as much as a new chain (and requires special tools to install). You probably don’t want that.
So you should invest in a chain checker and check the chain for stretch regularly: monthly at least and weekly if you ride more than a couple of days a week.
 |
| A couple of different tools for checking whether a chain is ready to replace. |
 |
| A typical chain tool. |
OK, now to change a chain, you only need one tool; cleverly called a chain tool. In reality, you’ll also want some degreaser and a brush like the Pedro’s toothbrush. You’ll also want a replacement chain. Either buy one in advance: the shop will need to know how many “speeds” – the number of cogs in the cogset, or remove the chain and take it with you. Many chains, if not all, have the manufacturer’s stock number stamped on every link. Get a new chain that has a master link, which makes these things a lot easier to install than a couple of decades ago.
Ready to start?
 |
| Routing through rear derailleur |
Step 1: Take pictures of your bike’s old chain before breaking it with the chain tool. That should help you reroute the new chain when you install it. Alternatively, grab a second bike to use as a reference.
Either put the bike in a work stand or flip it upside down to get better access to the chain.
Step 2: Place one of the bottom links of the chain ("bottom" meaning the side that would normally be closer to the ground) in the rear notch of the chain tool (the farthest from the handle). Turn the chain tool handle until the pin contacts the chain, and make certain the pin is centered on one of the pins in the chain. Crank the handle clockwise (right) – hard. The pins are “peened” like rivets, and it takes some effort to shear off the little mushroom of steel. Once it snaps, keep turning the handle until it won’t turn any more. The pin should now be all the way out of the bearing (see the first picture).
Step 3: Separate the chain at the broken link. It may come apart by itself, or you might have to work it a little. Once the two halves have separated, remove the chain from the drivetrain by pulling on the end of the chain that has a pin sticking out sideways.
Step 4: Take a few minutes to clean the cogset and chainwheel. Apply some degreaser and scrub off the accumulated crud with a bristle brush. Rinse everything with fresh water (don’t use a high-pressure spray) and repeat, if necessary. Clean the derailleur cage and the pulleys in the rear derailleur while you’re at it.
 |
| A filthy cogset. |
|
 |
| A cogset after degreasing and cleaning. |
|
Take out your new chain. Either lay the old and new chains out on clean newspaper or hang them from a nail. The new chain must be shortened to the same length (number of links) as the old one. If the new chain has a separate master link or “Power Link” (© SRAM), the new chain has to be one link shorter than the old one. Use the chain tool to break off any extra links.
Thread the new chain through the frame and drive train, being careful to follow the same routing around the cogs, pulleys and chainwheels as the old chain. Install the connector link following the instructions that came with the new chain. Before you set the connector completely, spin the pedals a few times to make certain the chain is routed correctly. Once you're sure, tighten the connector link.
You’re done – in less than an hour, including the time to clean the drivetrain!
Goodies that will make this job a snap...
Note: You may need to fiddle with the adjustment of the rear derailleur after installing a new chain.
Note 2: Chains (should) come from the factory pre-lubricated, but you’ll want to monitor the new chain for a while.
All content including photos copyright © 2014-2018 by the author


No comments:
Post a Comment